User Manual for LOCBUSS PIM
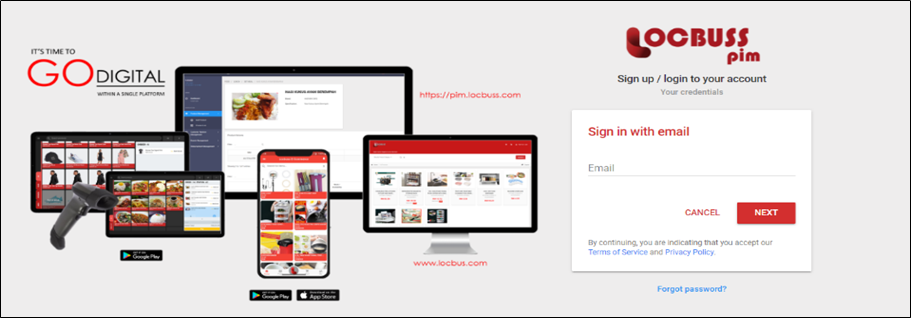
How to access to LOCBUSS PIM?
You can access LOCBUSS PIM through the following link:
https://pos.locbuss.com/locbusspos/public/login?mode=select
How to register to the LOCBUSS PIM?
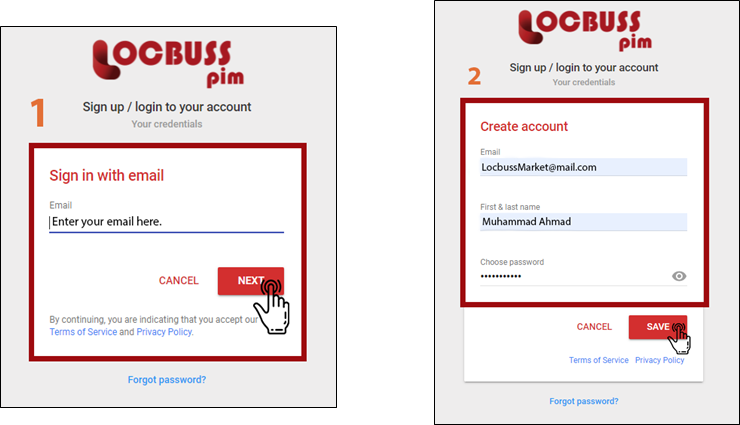
1. Sign in the system using valid email and click “Next” button.
2. “Create account” will be display if you do not have an account. You need to key in “first & last name” and “password”. Then click “Save” button.
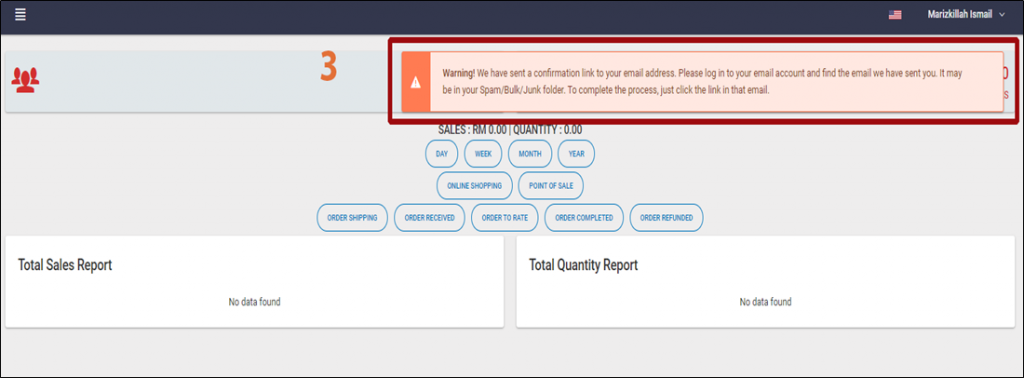
3. The system will direct to the dashboard. The warning prompt will appear to verify your e-mail address.
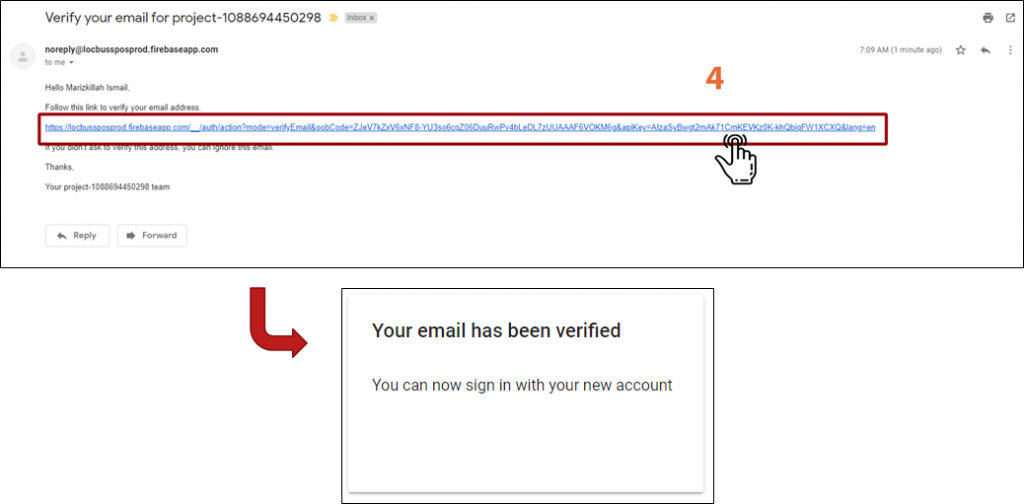
4. Login your email account and click the link to verify.
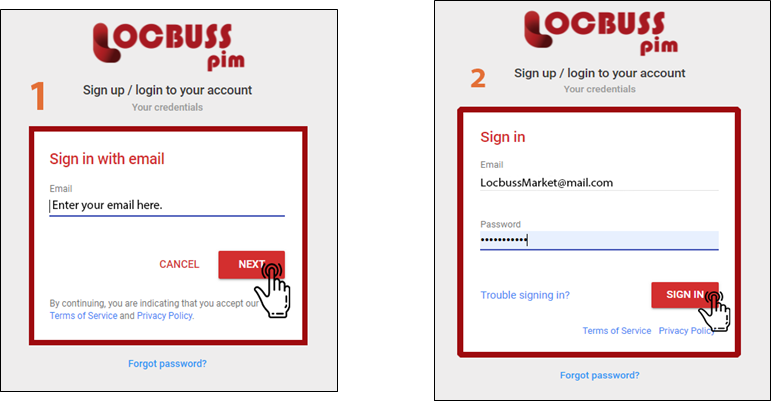
Login to the LOCBUSS PIM
1. Enter your email, then click “Next” button.
2. Enter your password, then click “Sign in” Button. The system will be direct to the dashboard.
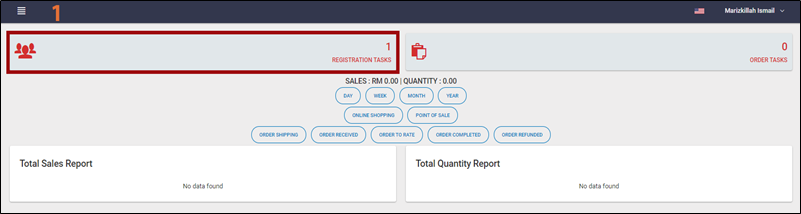
Registration Task
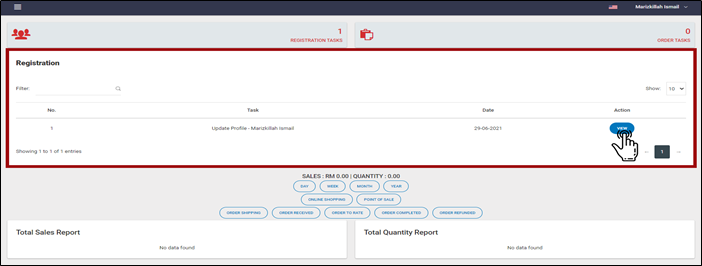
1. Once you successful register, you need to complete the “REGISTRATION TASK”
•Click “REGISTRATION TASK” >> Click “VIEW”
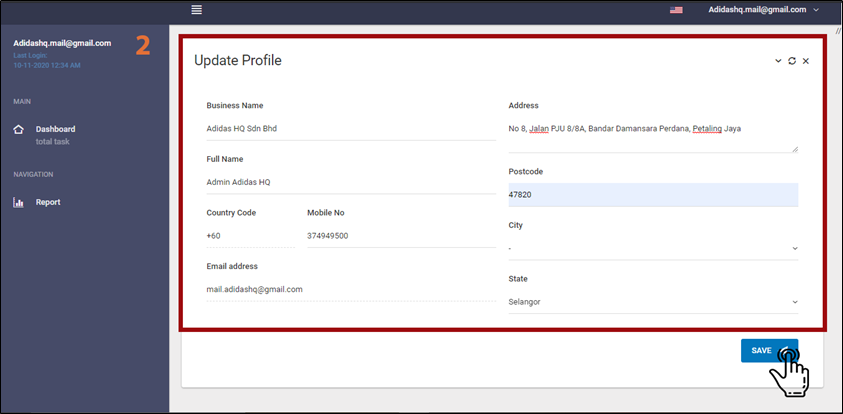
2. Update Profile, click “SAVE”
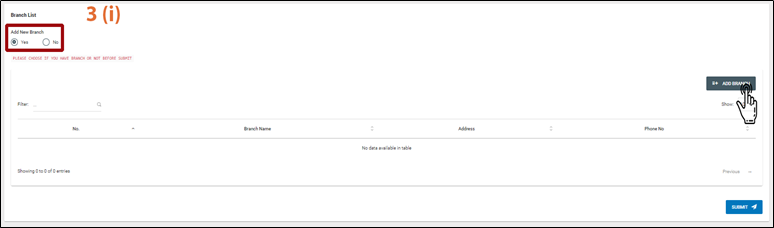
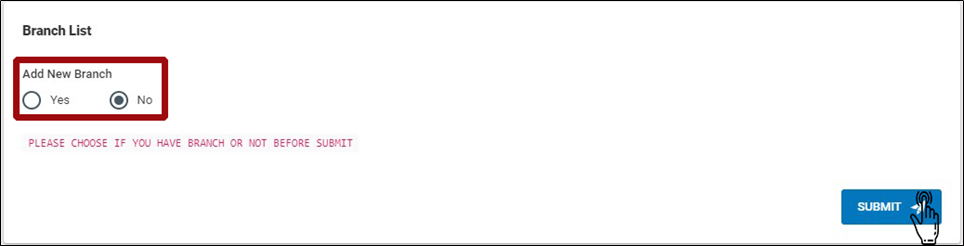
3. Branch List, you need to choose “Yes” or “No” then click “SUBMIT”.
i. If you have a branch to add, you needs to choose “Yes”
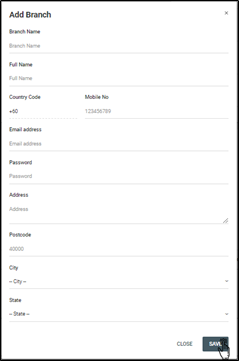
•Click “Yes” >> click “Add Branch” >> Fill “Add Branch” form >> click “SAVE” >> click “SUBMIT”
ii. If you do not have a branch, choose “No”
•System will not display “Add Branch” form and click “SUBMIT”
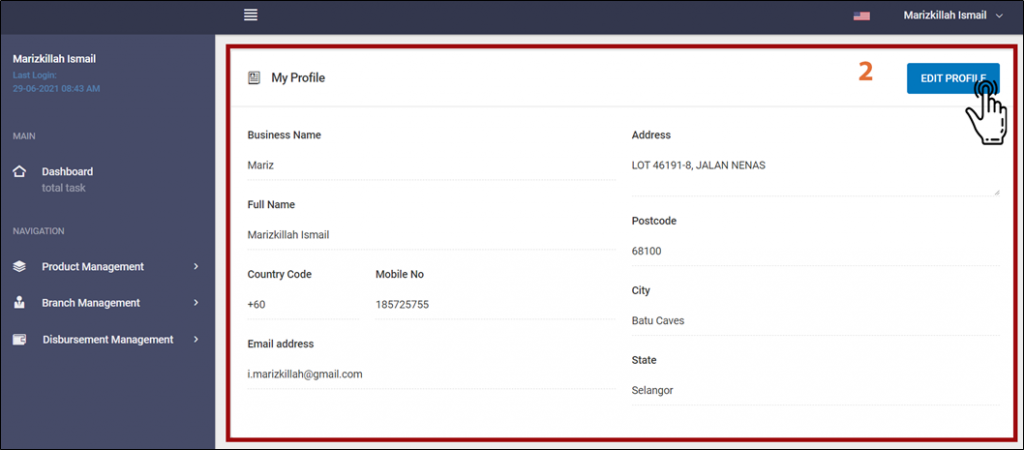
DASHBOARD – Edit Profile
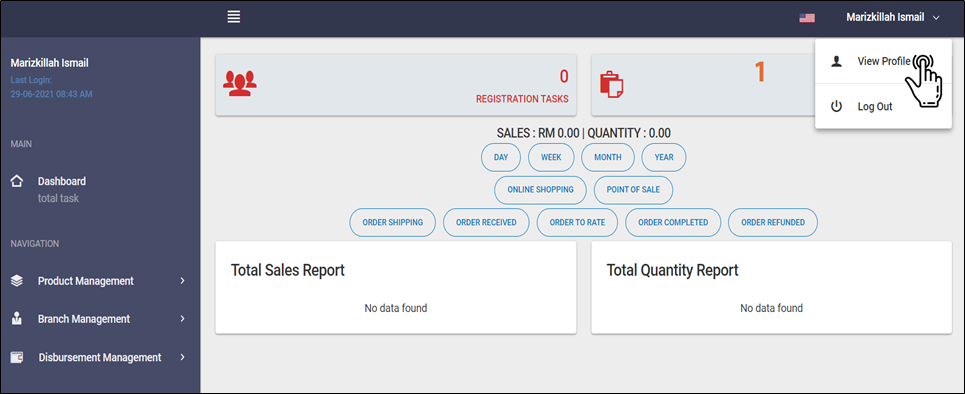
1. Click your name on top right screen. Click “View Profile” .
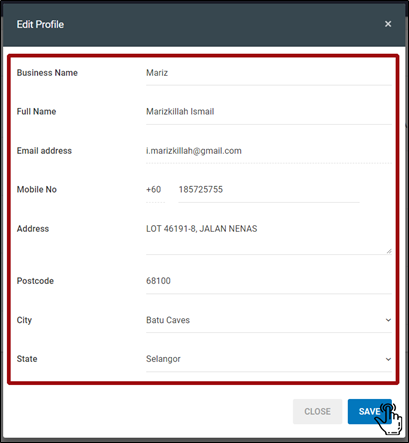
2. Click “Edit Profile” to edit your profile.
3. After complete editing profile, click “SAVE”.
How to Add Product?
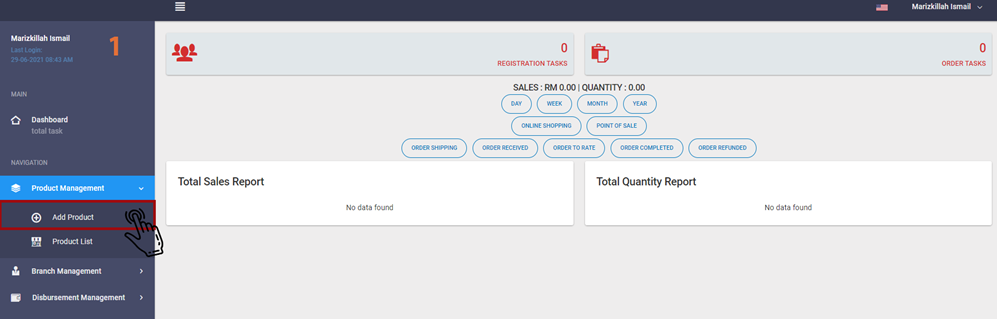
1. Click “Product Management” >> click “Add Product”. System will display the “What You’re Selling” form.
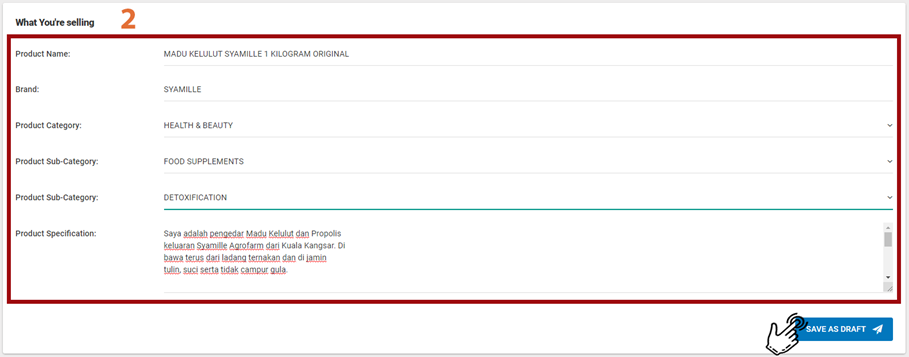
2. System will display the “What You’re Selling” form. Fill in the form and click “Save As Draft” .
3. The system will automatically display product images that need you to upload. Click “Browse” or drag and drop the file(s) to the upload product column.
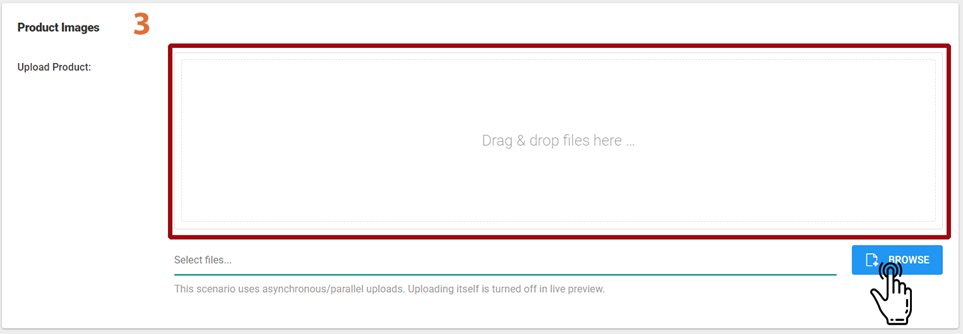
4. Click “Upload” to proceed with the uploaded images.

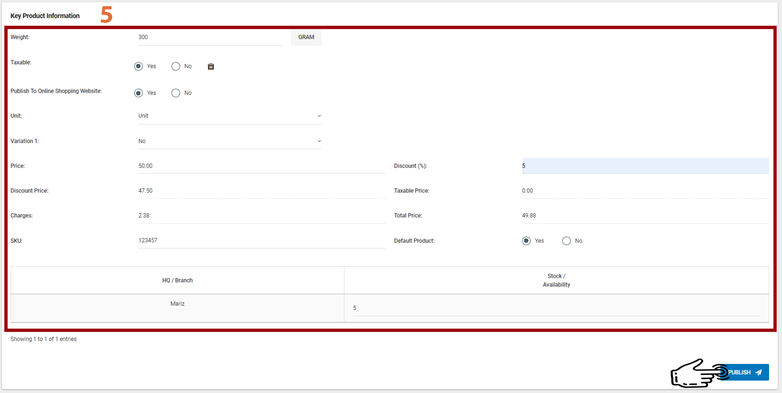
5. After uploaded images, the system will display “Key Product Information” form. Fill in the form and click “PUBLISH”.
• Please note that the variation represents the type of the product such as size and color.
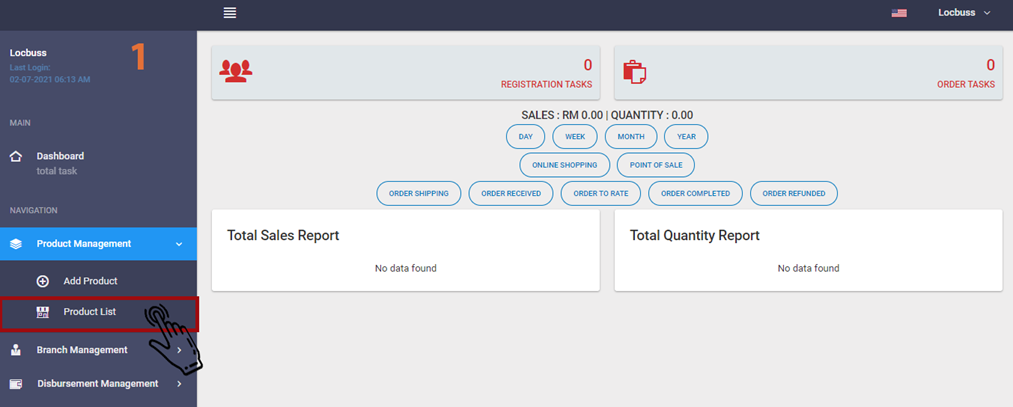
Product List
1. Click “Product Management” >> click “Product List”. System will display the “What You’re Selling” form.
How to view and Add Branch?
1. Click “Branch Management” >> click “Branch List”.
•The system will display the list of branches.
2. You can add the branch by click “Add Branch” .
3. Fill in the name of the branch and click “SAVE”.
4. Click the icon at the “Action” column and click “Details” button to view or “Deactivate” button to deactivate the branch.
5. To manage staffs and taxes, click icon at the “Action” column and click “Details” button.
6. At “List of Staff” tab, click “Manage Staff” button to add current staff from other branches. The system will display staff’s name.
Branch Management (Staff List)
1. Click “Branch Management” on the sidebar of the screen and then click “Staff List”. The system will display the list of branches.
2. User can add the branch by clicking the “Add Branch” button at the top right screen. The system will display the “Add Branch” form.